

Simple. Beautiful. Easy. A perfect recipe!
What you'll need:
 - Merckens chocolate wafers in whatever colours you like (any brand of chocolate molding wafers will work)* You'll have to guesstimate how much of each colour you'll need based on what you're using it for. I found that for my small letter mold, it was app. 2 wafers per letter and app.8 wafers per lollipop top.
1 - letters/alphabet
2 - lollipol top (round, square, star, heart etc.)
- lollipop sticks*
- microwaveable bowls
- spoons
- butter knife
- space in the fridge for the molds to lie flat
* I found all of these at Bulk Barn. Cake decorating stores, like McCall's have them as well. The total cost for chocolate, 2 molds, and lollipop sticks $20.00 and I made app. 15 lollipops with an extra 10 letters.
NOTE - if you have never worked with chocolate before it's really important for you to know that absolutely NO water can get into the melted chocolate. If water gets in, the chocolate will seize up and you will have to scrape it out and start over.
Step 1 - Preparing the mold for the tops
If you're using a lollipop mold, you can skip to Step 2
I found a Reese's Peanut Butter cup shaped mold that I thought would make great looking lollipop tops but it didn't have a spot for the sticks. Not a problem!

When I got home, I made a straight cut down the side of each mold. Then, I happened to find a metal tent stake from my son's UV tent that was the perfect diameter. I then heated one end on the flame from my gas stove (matches or a lighter will work as well). Once it was hot, I pressed it gently in to the middle of the side of the mold keeping it in line with the cut I made. A couple of times I didn't heat the metal long enough and had to re-heat and press until it poked through.


Then, I notched out the plastic to create some support for my lollipop stick so it would stay in place when it was in the hole.

Step 2 - Place all the lollipop sticks in the empty molds. Make sure non are touch the bottom of the mold. If they are, the white of the stick will show through the chocolate.

Step 3 - Place the Merckens for the tops into a microwaveable bowl. Start with 30 seconds and stir with a spoon. Continue heating in 30 second increments stirring each time until the chocolate is a think liquid that pours easily off your spoon. For larger amounts, it usually takes me three to four 30 second rounds in the microwave.


Step 4 - Carefully pour in the chocolate by the spoonful until each one is 80%-90% full. Tap the tray evenly (holding it on both sides and lifting it straight up before releasing to drop it) on the counter to remove any air bubbles and to smooth out the surface of the chocolate.

Step 5 - Place flat in the refrigerator until it's set (approximately 20 min.) and then carefully remove the lollipops from the molds.

Step 6 - Melt the chocolate in the microwave for the letters using the same method in Step 3.
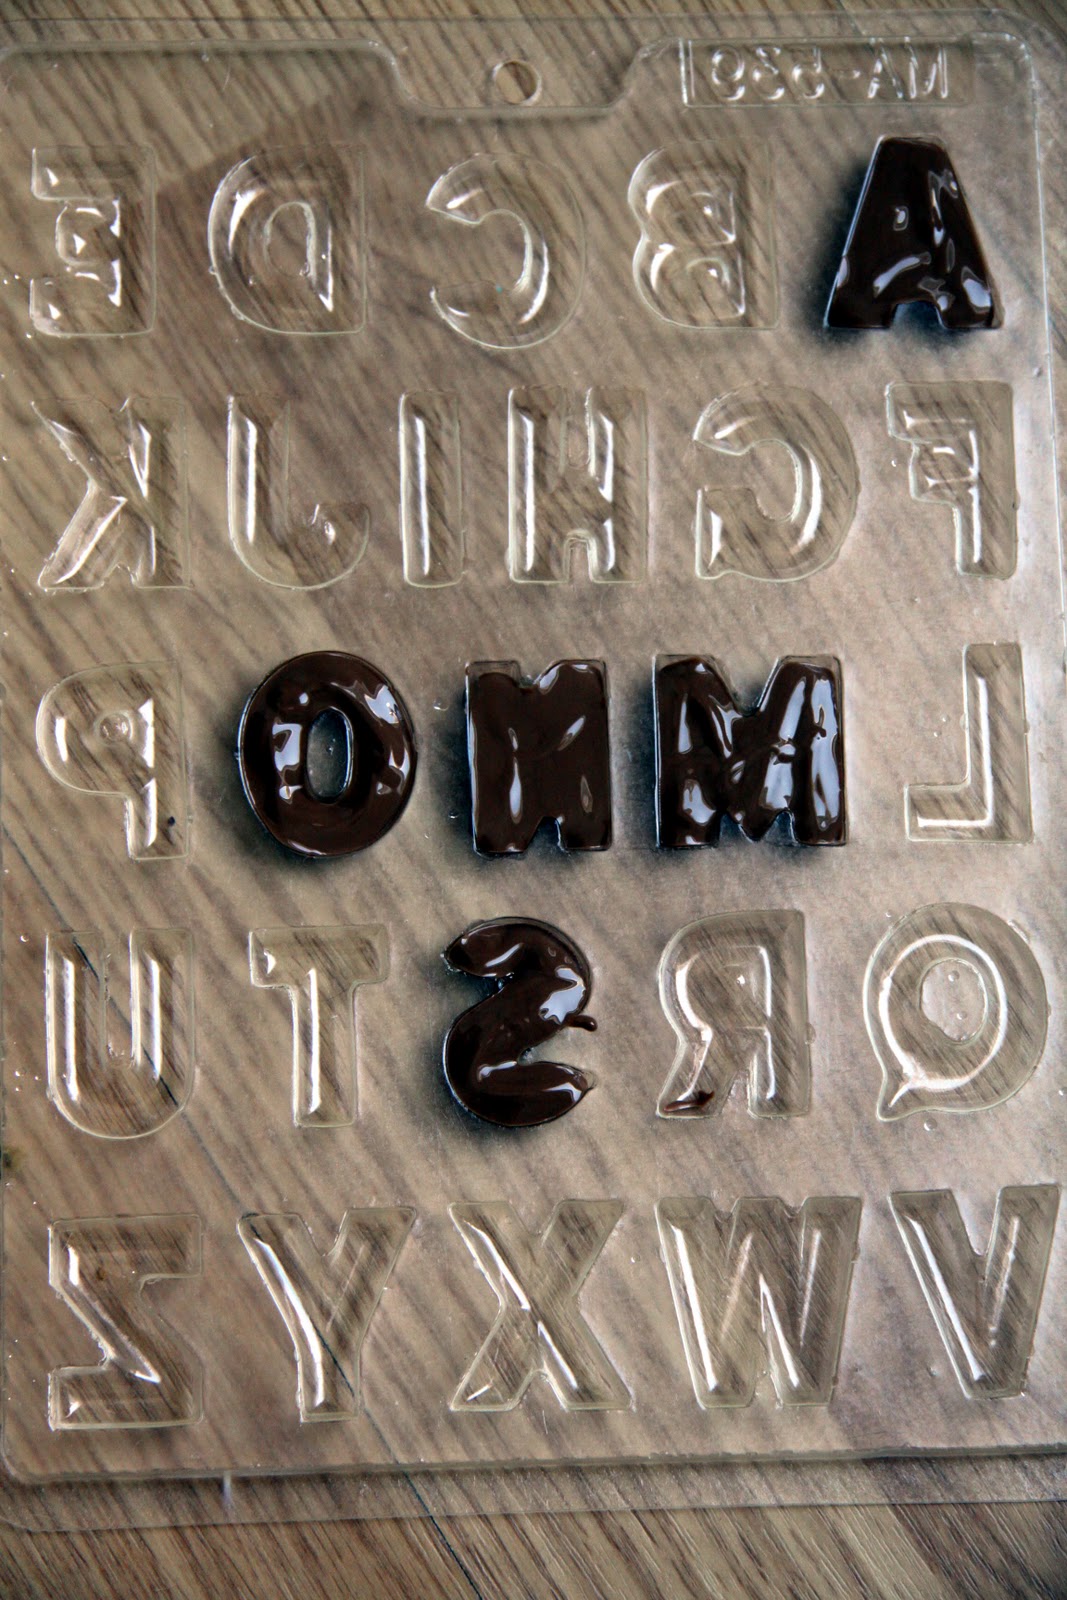
Step 7 - Carefully spoon in the chocolate into each letter. Be careful not to overfill! If you have chocolate on the outsides of the letter molds, carefully wipe it off with a dry cloth, paper towel, or your finger. Getting rid of any excess chocolate will keep the edges of the letters clean and prevents you from having to scrape it off later.
Step 8 - Tap the mold on the counter to remove the air bubbles.
 |
| Notice how uneven the surface is after I spooned in the chocolate |
 |
| After I tap the mold, the chocolate smoothes out. |
Step 10 - Once the chocolate is set, remove it from the fridge and give it a little twist, the same way that you twist an ice cube tray to release the ice. Be gentle - you're just trying to loosen it from the sides.
Step 11 - Flip the mold over and tap it gently on the counter. Most of the chocolate will fall out when you tap the mold, however some may need a little coaxing.


Step 12 - Reheat a little bit of chocolate that was left over when you filled the lollipop top molds. You will use this as the 'glue' for the letters.
Step 13 - With a butter knife (or anything else that gives you control over where you spread the chocolate) gently put chocolate on the back of one letter. This is will act like glue. Place the letter in the centre of a lollipop top. Press it down gently. Continue with the rest of the letters & tops.


Note - the chocolate letters will start to melt in your hands if you hold them for too long. If your hands are very warm there is also a chance you will leave fingerprints on the lollipop tops. To prevent either of these from happening, keep your workspace as cool as possible, handle the chocolate as little as possible. If necessary, run your hands under cold water and quickly dry them before assembling the pieces.
For a yummy and pretty variation - include candy such as mini M&Ms and mini marshmallows in the lollipop tops!
How cute are these candy pops! I love the colors you used on these. :)
ReplyDeleteI really thank you for the valuable info on this great subject and look forward to more great posts. Thanks a lot for enjoying this beauty article with me. I am appreciating it very much! Looking forward to another great article. Good luck to the author! All the best! personalized chocolate singapore
ReplyDelete