
 Cake Design
I would recommend that you start by looking at images online. Use Google Images to search for cakes using key words, for example "girl 1st birthday cake", "retirement cake" etc. Also, most cake designers have websites with galleries full of images. These are also wonderful sources of ideas.
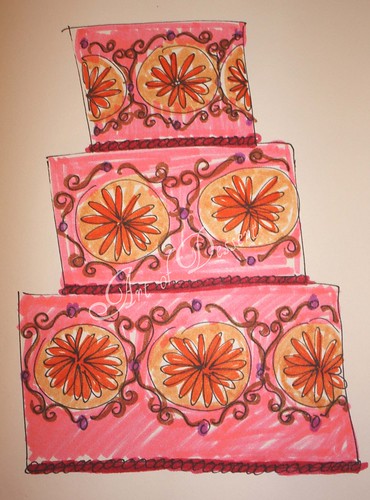 As you look at the images, deconstruct the decorations and figure out if you have the skills to be able to create a specific type of design. There's nothing worse than wanting to create a cake that looks a certain way and then not be able to do it because you don't have the ability! I learned quickly that my piping skills are horribly lacking and because I make cakes on a by-need basis I also don't practice, which means I avoid designs that require piping.
Once you've finalized your design, gather the tools you'll need and begin!
Colouring Fondant
This video is a little long but it shows how much you might need knead the fondant before it's ready for you to work with it.
Cutting Basic Shapes
Roll out your fondant on top of corn starch or icing sugar to the thickness you'd like the shapes to be. Using a fondant cutter or metal cookie cutter, press firmly into the fondant and then lift it away. Gently remove the fondant shape.

For straight bands of fondant to use as stripes or to use around the base of a cake, you can buy a specific tool or you can use a ruler & knife and cut them your self.
If you want the shape you cut to mold itself to the shape of the cake, you can make your cut-outs when you're ready to decorate and apply directly to your cake. When you put fondant shapes onto a fondant covered cake, use a smidgen of water (it acts like glue) on the back of the cut-out before you place it on.
If you want the shapes to hold their shape away from the cake you'll need to make them ahead of time and let them dry. I have had some decorations that weren't dry after a week so I highly recommend making them well in advance.
To help your fondant dry in the correct shape use whatever you have available to support it. Egg cartons are great for making flowers dry with their centres down and petals curving upwards. I once used a bunch of cutlery laid out underneath my decorations to create the shapes I wanted while they dried.

To attach dried fondant pieces, pipe royal icing either onto the back of the decoration or onto the cake itself before you put it on the cake.
Here are some other ways to use cut-out shapes:
| Layer cut-outs on top of each other. |
 |
| Cut free-form shapes and apply them to your cake |
 |
| Here's a very pretty example of using both dried fondant cut-outs and other techniques to decorate. Notice the stems have been piped or painted whereas the flowers and leaves are lifting away because they were dried ahead of time. |
Rolled fondant shapes - Balls, Ropes & Braids
As I'm sure you've guessed by now, working with fondant is very much like working with a grown-up version of Playdough. Similarly, you can create round balls, long ropes and braids the same way as well.
 |
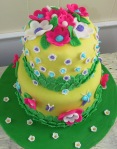
| I think fondant balls are best suited for children's cakes. They're playful and child-like. Notice on this cake that the circle fondant cut-outs have been placed one inside the other for another cute whimsical touch. |
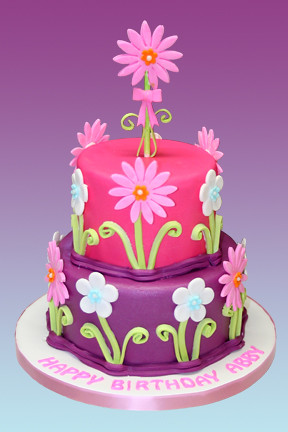 |
| Cut-outs have been used for the flowers, straight bands of cut fondant were used for the stems and also curled on their sides for the leaves. Rolled fondant ropes have been placed in rows of two at the base of each cake to give a flower-garden feel. |
 |
| You can make this cake (other than the bow) based on all of the techniques described in this posting: - dried cut-out flowers & leaves - cut-out fondant dots - cut fondant band stripes - cut fondant bands around the base - rolled rope fondant around the bottom of each cake |
If you're interested in learning more, Wilton has pages and pages of tutorials for different decorating ideas and techniques.
Birthday Cake Tutorial
Last, but not least, here is a fantastic tutorial I found to make this sweet birthday cake that uses only the basic decorating techniques discussed above:

Up Next: Part 6: Intermediate Decorating Techniques
As I have found wonderful source about how to decorate our special moments cake. The regarding features are specially looking elegant to decorate the delicious cake of ours. It's one of knowledgeable featured source for me. Thanks for sharing.
ReplyDelete